Why You’ll Love This Recipe
There’s something magical about the sweet aroma of homemade apple cider filling your kitchen on a cool autumn day. 🍂 This recipe isn’t just a drink – it’s a warm hug in a mug that brings family and friends together! Unlike store-bought versions, this homemade apple cider recipe lets you control the sweetness and spice levels, making it perfectly tailored to your taste.
What makes this recipe special is its simplicity. With just a few basic ingredients and minimal hands-on time, you’ll create a memorable fall drink that’s perfect for everything from quiet evenings by the fire to festive gatherings. It’s also a wonderful way to use up those extra apples from your apple-picking adventures!
Many of my readers tell me they make this recipe a central part of their fall traditions. There’s something deeply satisfying about creating something so delicious from scratch, and the incredible aroma that fills your home is an added bonus. Plus, it’s naturally gluten-free, making it a drink everyone can enjoy!
Homemade Apple Cider Recipe
Ingredients
- 10-12 medium apples (mixed varieties work best – try Honeycrisp, Gala, Granny Smith, and Fuji)
- 1 orange, quartered (optional for a citrus twist)
- 2-3 cinnamon sticks
- 1 tablespoon whole cloves
- 1 teaspoon whole allspice
- 1 whole nutmeg or 1/4 teaspoon ground nutmeg
- 1/2 cup maple syrup or brown sugar (adjust to taste)
- Water to cover (about 16 cups)
- 1 inch piece of fresh ginger (optional)
- 2-3 star anise pods (optional)
How to Make Homemade Apple Cider
Step 1: Prepare the Apples
Wash all your apples thoroughly under cool running water. There’s no need to peel or core them – simply quarter each apple and place them in a large stockpot. 🍎 The peels and cores contain pectin, which adds wonderful body to your cider.
Step 2: Add Remaining Ingredients
Add the orange quarters, cinnamon sticks, cloves, allspice, nutmeg, and any optional ingredients to the pot with the apples. Pour in enough water to cover the ingredients by about an inch (approximately 16 cups, depending on your pot size).
Step 3: Simmer the Cider
Bring the mixture to a boil over high heat. Once boiling, lower the heat to maintain a gentle simmer. Cover the pot and let everything cook for about 2 hours. Your home will start to fill with the most amazing apple spice aroma! ✨ The longer you simmer, the deeper the flavor will be, but avoid going beyond 3 hours as it can become bitter.
Step 4: Mash and Strain
After simmering, use a potato masher or large spoon to gently mash the softened apples and release more flavor. Let the mixture cool for about 20-30 minutes, then strain through a fine-mesh sieve into a large bowl, pressing the solids to extract all the liquid. For an ultra-clear cider, strain a second time through a cheesecloth.
Step 5: Sweeten and Serve
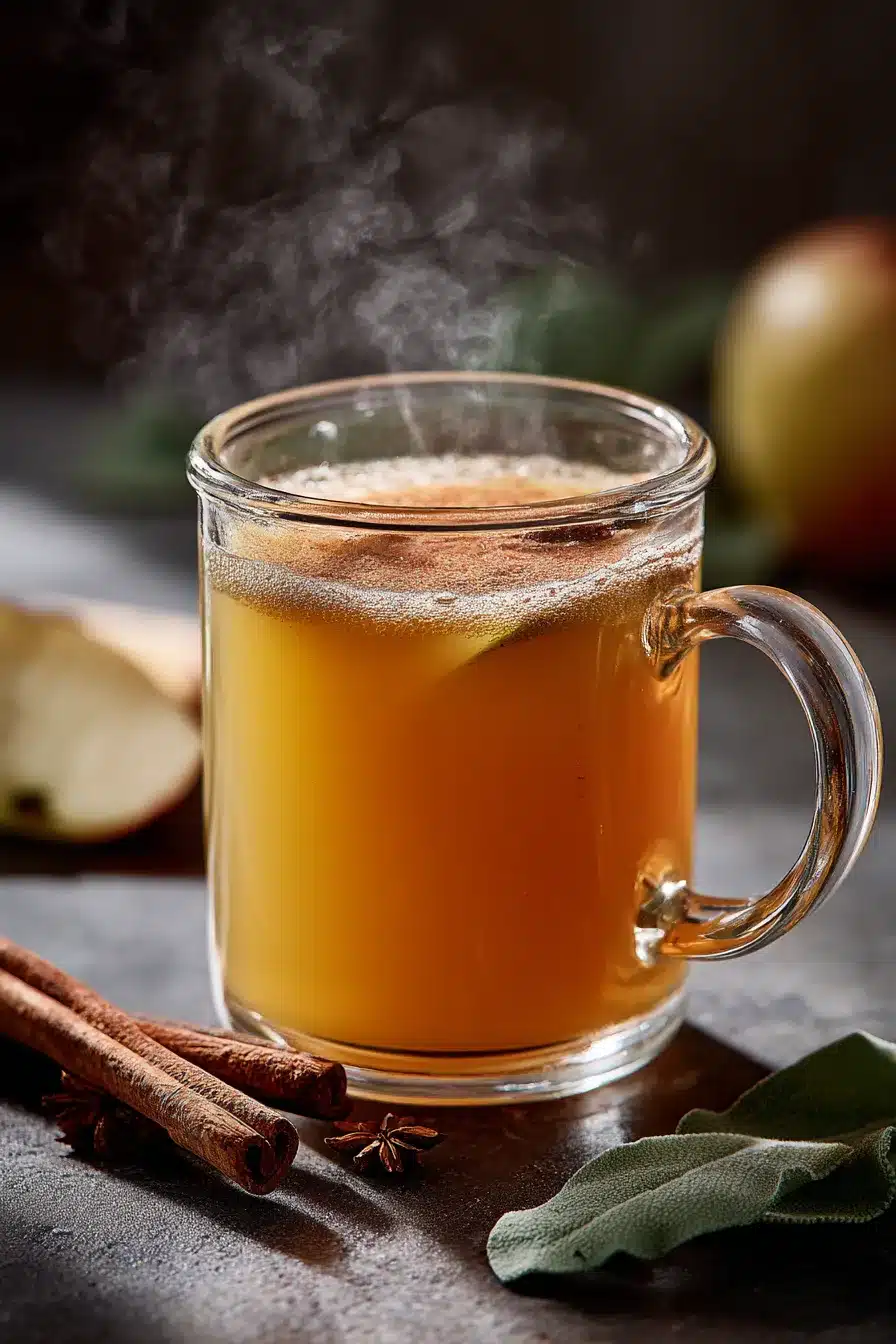
Return the strained cider to a clean pot. Add maple syrup or brown sugar to taste, starting with 1/4 cup and adjusting as needed. Warm gently before serving in mugs, garnished with cinnamon sticks and apple slices if desired.
Serving Suggestions
The beauty of homemade apple cider is its versatility! Here are some wonderful ways to serve your fresh cider:
- Serve hot in mugs with cinnamon stick stirrers and thin apple slices floating on top
- Create a cozy cider bar with garnish options like caramel drizzle, whipped cream, and various spices
- Add a splash of vanilla extract for extra warmth and depth
- Serve alongside fresh donuts for a classic fall pairing
- Pour over ice with a splash of ginger ale for a refreshing cold version
For special occasions, set up a complete cider bar with different garnishes, spices, and mix-ins so guests can customize their drinks. This is always a hit at fall gatherings! 🍁
Storage Instructions
Refrigerator
Your homemade apple cider will keep beautifully in the refrigerator for up to 7 days. Store it in airtight glass containers like mason jars for the best flavor preservation.
Freezer
Apple cider freezes exceptionally well! Pour cooled cider into freezer-safe containers, leaving at least 1 inch of headspace for expansion. It will keep for up to 3 months. This is perfect for preserving the fall flavors well into winter.
Reheating
To reheat your cider, pour the desired amount into a saucepan and warm over medium-low heat until it reaches your preferred temperature. Avoid boiling as this can affect the delicate flavor balance. For single servings, microwave in 30-second intervals, stirring between each.
Helpful Tips
Apple Variety Mix: For the richest flavor, use at least 3-4 different apple varieties. The combination of sweet and tart apples creates a more complex flavor profile.
Spice Sachet: Place your whole spices in a cheesecloth bag or tea infuser for easy removal – especially helpful if you plan to reserve some cider for cold serving.
Natural Sweeteners: Try different sweeteners like honey, maple syrup, coconut sugar, or brown sugar to find your perfect flavor balance.
Slow Cooker Option: For hands-off preparation, use a slow cooker instead of a stovetop. Cook on low for 6-8 hours, then proceed with mashing and straining as directed.
Recipe Variations
Cranberry Apple Cider
Add 1-2 cups of fresh cranberries to the pot with your apples for a beautiful ruby color and tart flavor that’s perfect for holiday gatherings.
Caramel Apple Cider
After straining, stir in 1/3 cup of caramel sauce for a decadent dessert-like drink that children and adults alike will adore.
Spiced Pear Cider Blend
Replace 3-4 of the apples with ripe pears for a subtle flavor variation that pairs wonderfully with the same spice blend.
Extra-Spicy Cider
Double the cinnamon and add 1/4 teaspoon of ground cardamom plus a pinch of black pepper for a cider with extra warming properties – perfect for cold evenings!
FAQs
Can I use apple juice instead of fresh apples?
Yes, you can simmer store-bought apple juice with the spices for a quicker version, though the flavor won’t be quite as rich. Use 1 gallon of juice with the same spice quantities and simmer for 30-45 minutes.
Can I prepare this ahead of time for a party?
Absolutely! Make it up to 3 days ahead and store in the refrigerator. Reheat gently before serving. The flavors actually develop and improve with a day or two of rest.
Is this recipe gluten-free?
Yes! This homemade apple cider recipe is naturally gluten-free, making it perfect for guests with gluten sensitivities. Just be sure any pre-packaged spices you use are certified gluten-free if cross-contamination is a concern.
How can I make it more flavorful?
For extra flavor depth, try adding a vanilla bean (split lengthwise) during simmering, or incorporate a few strips of orange zest. A pinch of salt can also surprisingly enhance the apple flavor. For adult gatherings, a splash of bourbon added to individual servings (not during cooking) is delicious.
Conclusion
There’s nothing quite like homemade apple cider to welcome the fall season into your home. This recipe transforms simple ingredients into a comforting beverage that warms both body and soul. The beauty of making cider from scratch is not just in the delicious result, but in the process itself—the wonderful aromas filling your home create an atmosphere of warmth and coziness that no store-bought version can match.
Whether you’re enjoying it alone with a good book, serving it at a family gathering, or setting up a festive cider bar for friends, this homemade apple cider recipe is sure to become a cherished fall tradition in your home. The best part? It’s incredibly simple to make, yet feels special every time.
Ready to discover more seasonal recipes that bring comfort and joy? Check out my collection of fall favorites and holiday treats on Pinterest! 📌 Follow me at pinterest for daily inspiration that will keep your kitchen filled with delicious aromas all year round.
Printable Recipe Card
Want just the essential recipe details without scrolling through the article? Get our printable recipe card with just the ingredients and instructions.